
(Baby Shower Gift)
Knitting Pattern
By: Amal Saleh
Aka: Purpleneedle

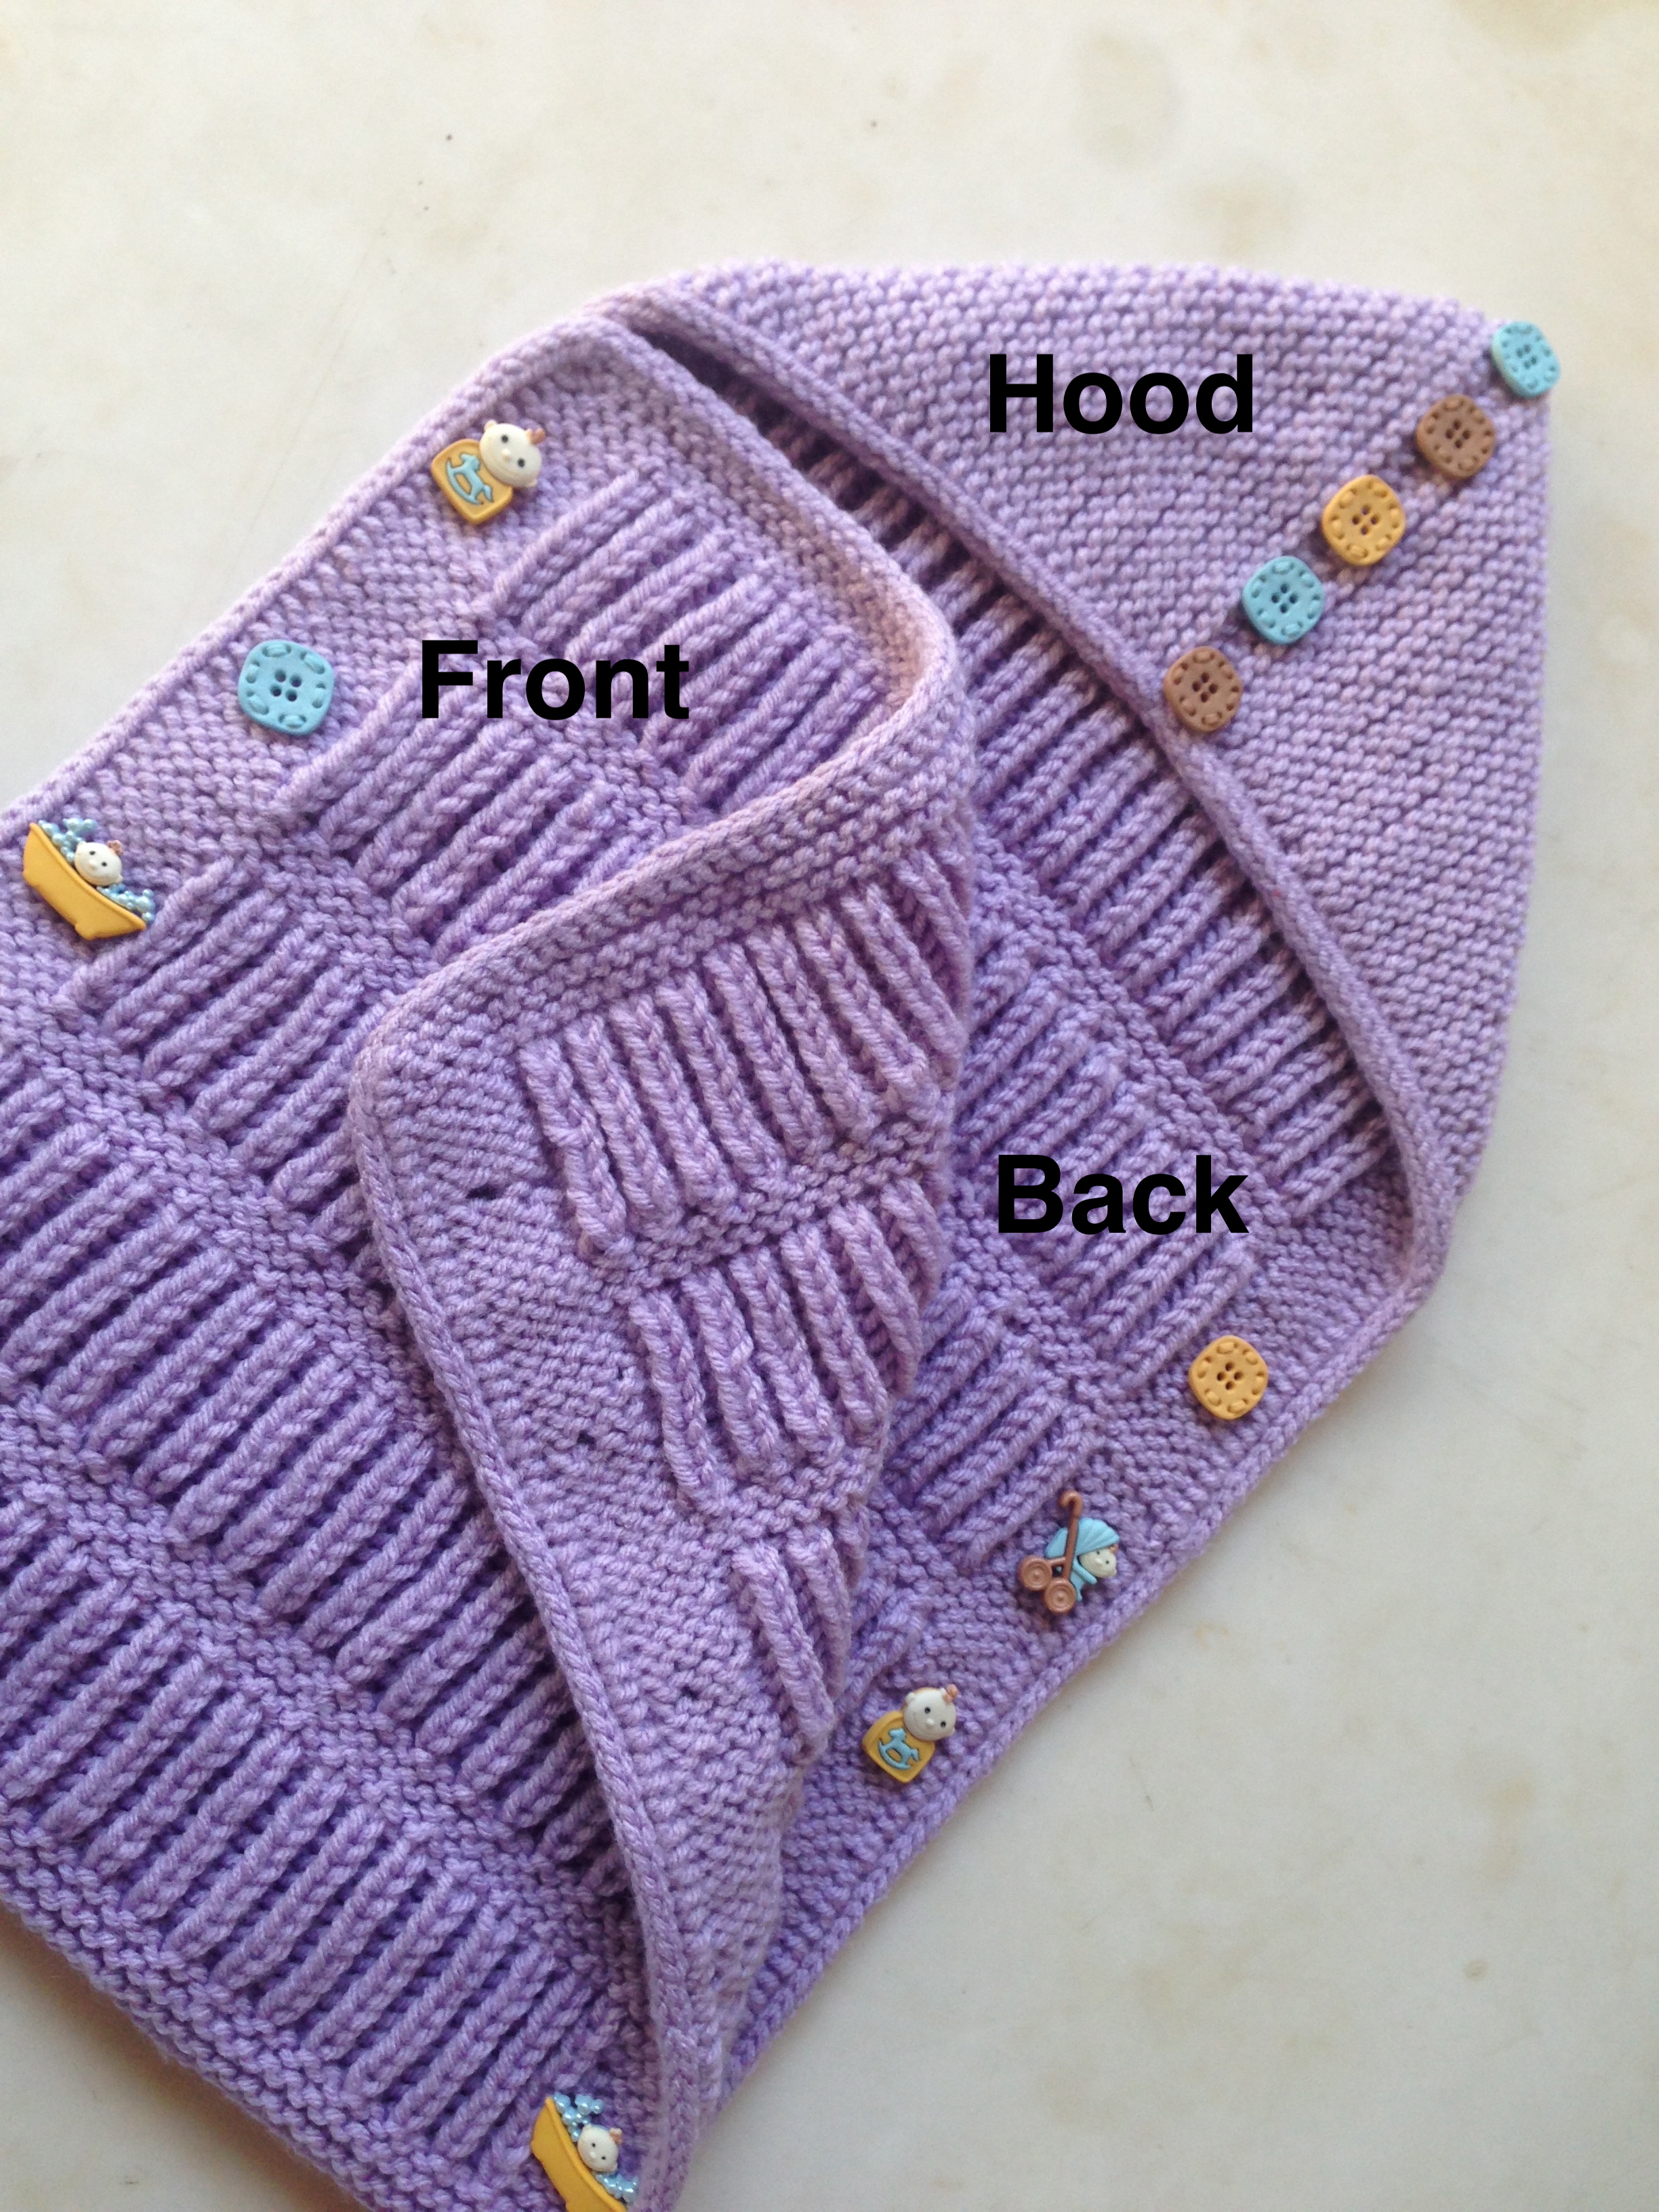
This baby blanket is knitted as One Rectangular Piece then folded like an envelope to receive the newborn and keep her/him warm.
It makes an easy quick Gift for any expectant mother.
The pattern is worked using size 7 US needles and Worsted weight yarn category 4.
It’s designed for Newborn to 1Month along with instructions on how to customize size and accommodate bigger babies.
Skill Level:
Easy Intermediate
Finished Measurements (Unwashed/Unblocked):
- Width – 12 ½”
- Length (Folded) – 20 ½”
Needles & Markers:
- Straight or Circular Size 7 US (4.5mm)
- Double Points Needles (DPNs) smaller than Size 7 US (3.5mm)
- Two ring markers & one removable marker (optional)
Yarn:
- The featured project is worked using Sincerely, Purl Essence Baby yarn. Color, Sincerely Lavender.
- To complete this envelope, you may need about 250 grams or 474 yards (1 ½ Skeins).
Buttons or Zippers:
- Zippers are ideal for this project because iCord provides the stability needed to sew a zipper on each side of the envelop. If you decide on zippers, you need two 12 inches long.
- If you decide on buttons, buy them after completing the project to make sure they’re the right size and style. For this project you need 10 buttons.
Gauge (Unwashed/Unblocked):
- Garter – 4 stitches & 4 ridges in one inch.
- Fisherman’s Rib – 4 stitches & 8 rows in one inch.
Notes:
- This pattern is worked as One Piece and presented in 3 Parts: Hood Section, Back Section, and Front Section.
- The Hood Section is worked in garter rows then the Cast On edge is folded in half and joined to form the hood.
- The Back Section is worked in repeated pattern of Fisherman’s Rib, bordered and interrupted by Garter Rows.
- The Front Section is the same as the Back Section with the addition of the buttonholes.
- All edges are finished by continuous iCord using Dpns (Double Points Needles).
- The Buttons featured in this project are not sewed on. They’re placed for presentation proposes.
- If you couldn’t find the yarn I’ve used in the featured envelop, any Aran or Worsted weight yarn will substitute perfectly for this project.
- To avoid allergy in a newborn it’s recommended that you use acrylic or cotton fibers.
Stitches & Techniques:
Before starting on this project please make sure you’ve master the following stitches:
- Cable Cast On or Provisional Cast On
- Garter Stitch
- Fisherman’s Rib (K1b, P1)
- Button Holes
- 3 Needles Bind Off
- iCord
| Bo | Bind Off |
| Co | Cast On |
| K | Knit |
| K1b | Knit One Below |
| K2tog | Knit Two Together |
| P | Purl |
| Repeat | Repeat rows or stitches between round brackets |
| Ridges | Ridges in Garter are formed by two rows of knit every stitch or two rows of purl every stitch. In garter it’s easier to count ridges than rows. |
| RS | Right Side |
| SSK | Slip, Slip, Knit |
| Sts | Stitches |
| Yo | Yarn Over |
| WS | Wrong Side |
Pattern:
- Hood Section
Using larger size needle and Cable Cast On, or Provisional Cast On, Co 51 Sts
| Rows | Instructions |
| R1 to R50 | Work 25 Ridges in Garter
Do not cut yarn at the end of this section; just continue knitting the next section |
- Back Section (6 Repeats of Fisherman’s Ribbing)
| Rows | Instructions |
| R1 | K5, K1b, (P1, K1b) Repeat until last five Sts, K5 |
| R2 | K5, P1, (K1b, P1) Repeat until last five Sts, K5 |
| R3 to R18 | Repeat R1 & R2 |
| R19 to R24 | Work 3 Ridges in Garter |
| R25 to R144 | Repeat R1 to R24 five more times or until piece measures 21” from Co
Do not cut yarn at the end of this section; just continue knitting the next section |
- Front Section (5 Repeats of Fisherman’s Ribbing)
| Rows | Instructions |
| R1 to R6 | K (work 3 Ridges of Garter) |
| R7, R9, R11, R13, R17, R19, R21, R23 | K5, K1b, (P1, K1b) Repeat until last five Sts, K5 |
| R8, R10, R12, R14, R16, R18, R20, R22, R24 | K5, P1, (K1b, P1) Repeat until last five Sts, K5 |
| R15 (Button Hole) | K1, K2tog, Yo, K2, K1b (P1, K1b) Repeat until last five Sts,
K2, Yo, SSK, K1 |
| R25 to R120 | Repeat R1 to R24 four more times or until piece measures 34” from Co |
| R121 to R126 | K (work 3 Ridges of Garter) Do Not Bo (keep stitches live on waste yarn or stitch holder to be used later in iCord) |
Finishing & Edging:
- Hood – Using smaller size needles (DPNs), pick up stitches from Cable Co edge or Provisional Co Edge, fold in half and use Three Needles Bo to close the hood and form the triangular shape.
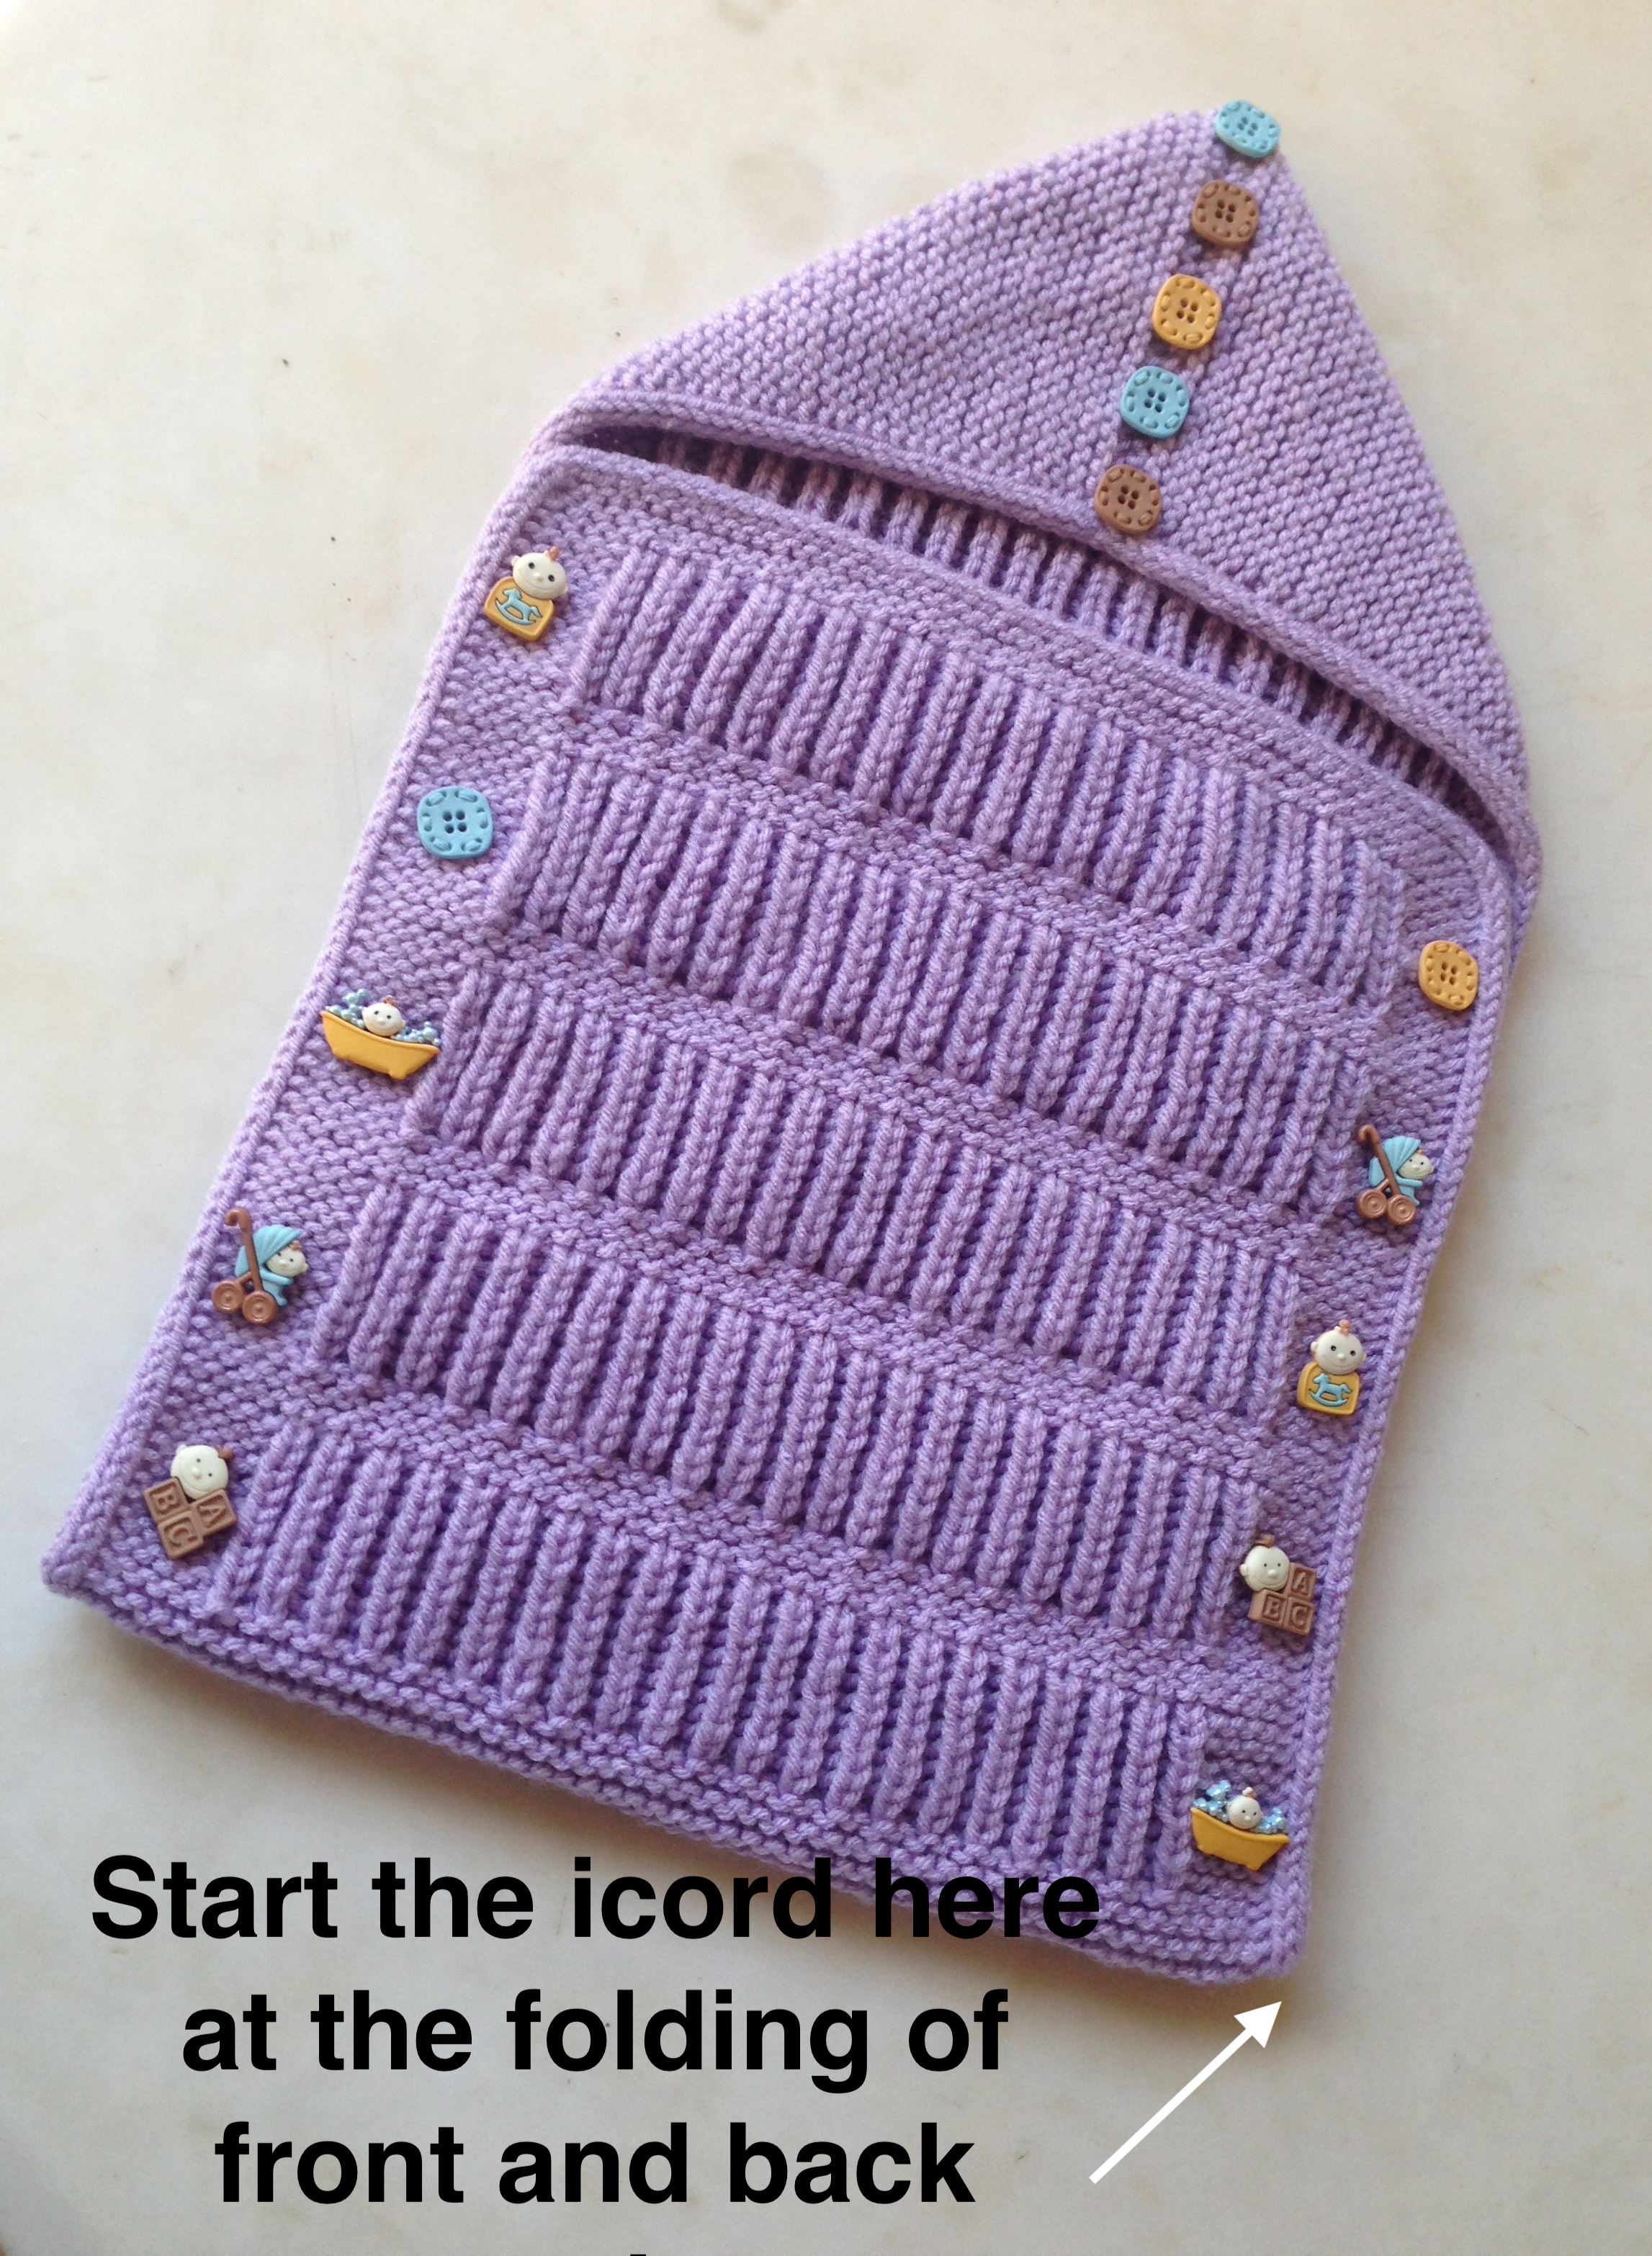
- iCord – Start the iCord at the last Row of the Back Section and end it at the first row of the front section so when you sew to connect the two ends of the iCord the ends will be hidden in the corner folding of the envelop.
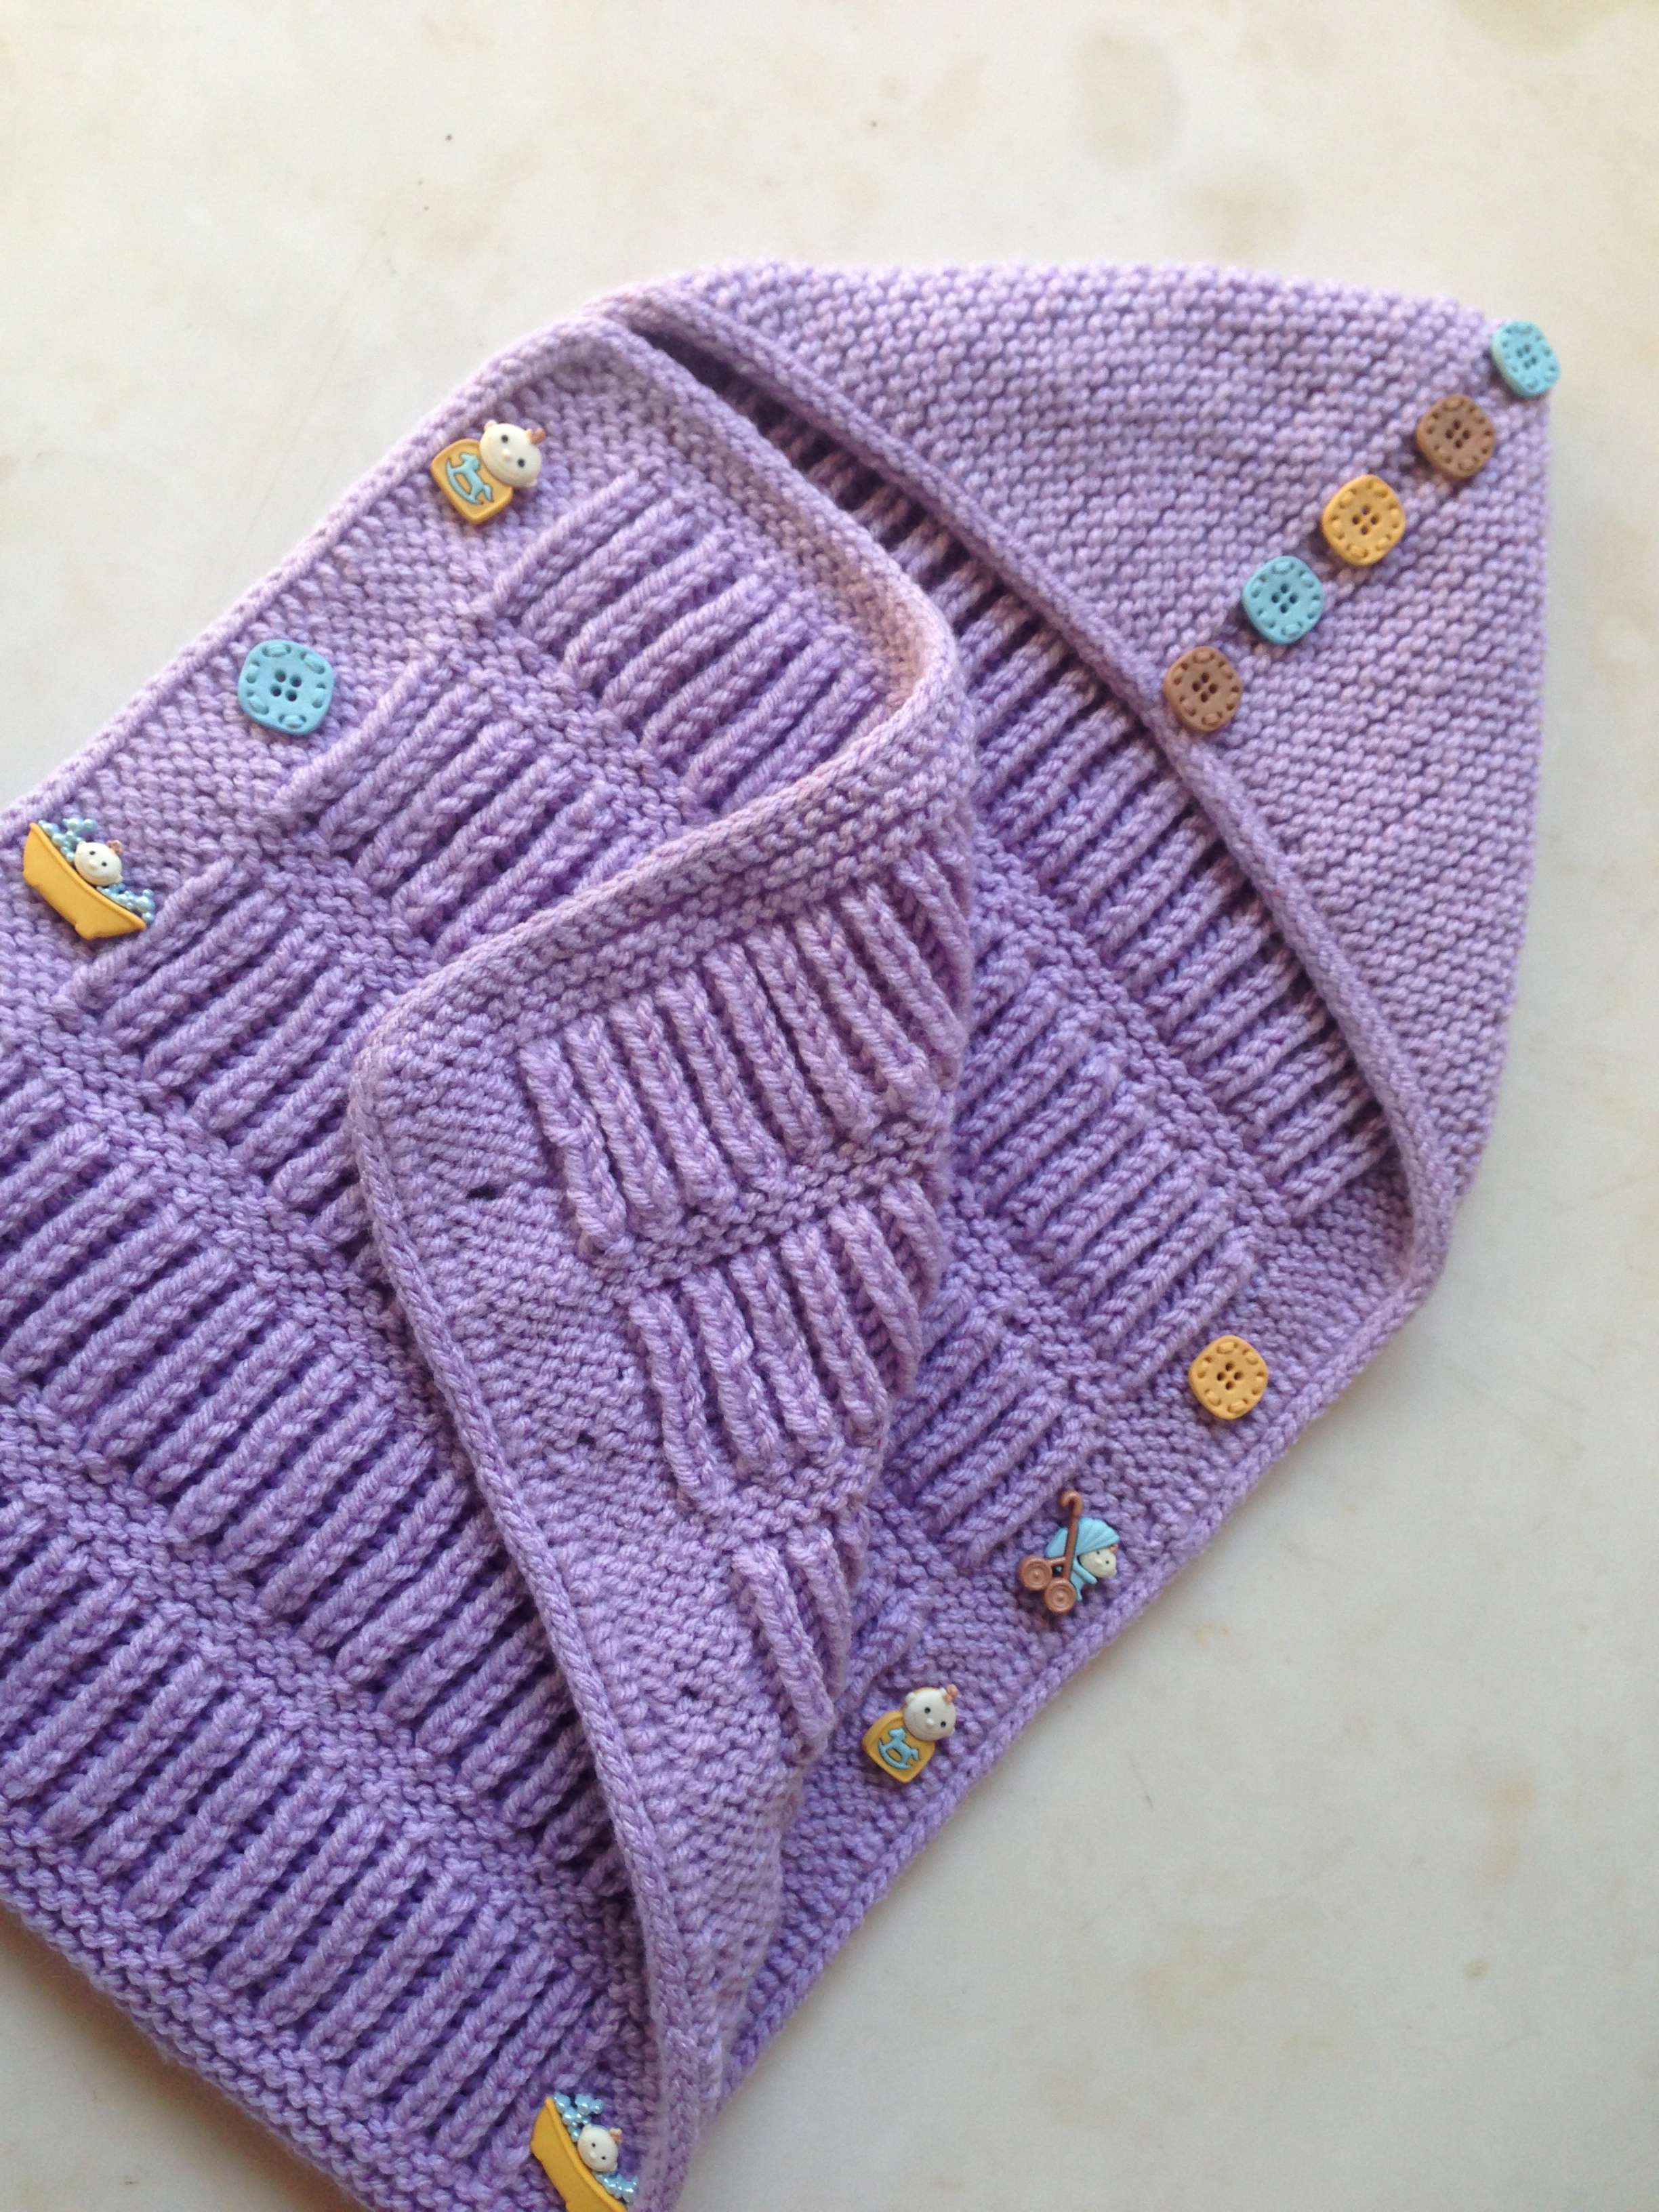
- Fold the envelope as seen in photo then add buttons or zippers.
How To Customize Size
- When casting on, add or subtract 2 stitches to increase or decrease the width of this baby envelope.
- Every additional 4 stitches will increase the width by 1 inch.
- You can increase or decrease the length by adding or subtracting ridges (2 rows) from Garter rows or 2 rows from Fisherman’s rows.
- Every 4 additional Garter Ridges will increase the length by 1 inch.
- Every 8 additional Fisherman’s Ribbing will increase the length by 1 inch.
How To Avoid Mistakes
- Garter front & back sides can be easily confused even by experienced knitters.To avoid such confusion place removable marker on the Wrong Side (or the Right Side) when working the Hood Section.
- When starting the Back Section, place a ring marker after the first five stitches and before the last five stitches. It will help remind the pilot knitter inside you that you are starting or ending the Fisherman’s Rib.

Would like the pattern please
Which pattern?
https://purpleneedle.wordpress.com/2015/10/22/fishermans-baby-envelope/
This is the pattern I used.
Do you need any help with this pattern?
Yes I would like the free pattern please ,baby sleeping bag with hooded
Hi Norma,
The pattern is called Fisherman’s Baby Envelope. Its free on WordPress
the fisherman’s baby envelope. Please can you help me how many stitches should i use for the i cord. I have started and used 3 which look ok but I do not understand what to do with the very last row which i have placed on a stitch holder? Many thanks
Hi Becky Eglinton, use tapestry needle to bind off the last three stitches and join them to the beginning of the icord. I hope this helps.
Dorothy did you get the pattern? im also looking for it please
Yes I did get a pattern
Sent from my iPad
Just starting the front section of this Fisherman’s Baby Envelope. Love the way it is coming together but am confused on the pattern change for the front vs the back. Each section of the back has 18 rows of the Fisherman’s stitch but as the pattern is written the front has only 10 rows (these counts do not include the garter stitch ridges). In looking at the pictures on the purpleneedle wordpress website, however, the front section shows a row count consistent with the 18 rows of Fisherman’s. Can anyone or the pattern designer help me please?! As written the front is 34 rows less than the back which seems too short to me but what do I know. Thanks all!
Sandy you are absolutely right. The Front Section Fisherman’s Stitches rows should mirror the Back Section. My only excuse is that I was lost in editing after R16. I’ll fix it. Thank you Sandy and sorry for the confusion.
I am just finishing the baby envelop (which my daughter requested and I love!) and now am confused about the iCord finish…I understand where to start and stop but I’ve never done this stitch before. When I come to the live stitches is it a different process? Might you have a link that would help me with this?
Thanks
Hi Judy, if you’ve never done an iCord or applied iCord, you may need to practice first making an iCord using waste yarn then practice applied iCord on a swatch or a washcloth.
The following link shows how to work an iCord
http://www.wikihow.com/Knit-an-I-Cord
The following link shows how to work applied iCord
You’ll notice that when working applied iCord you’ll need to pick up stitches from the garment edge and incorporate them in the icord. When you reach the live stitches edge you can use those live stitches and incorporate them in the applied iCord. I hope that helps.
Thanks I’ll try that
If applied iCord seemed too hard, you can pick up stitches from all edges and knit in the round 4 to 5 rows of stockinetts which will curve on its self in a tube like border.
Nowhere does it tell you how to attach the hood to the fishermans rib sleeping bag
Hi Carol Filmer. You do not attach the hood because you actually start working the hood and continue to finish the back then the front in a rectangular shape and once you’re done, you’ll fold the hood cast on edge in half and sew them together or use three needles bind off to close them and that will form the hood. I hope that helps.
Thanks that makes more sence
I cannot do the I cord no matter how much I watch video is there anything else I can do thanks xxx
Hi Jackie, it’s better to practice the icord on a swatch or washcloths before applying it to any project.
If you find icord annoying you can use a long circular needle to pick up and knit stitches from all around the envelop then knit five to six rows of stockinette stitches which will curl on itself and look like icord
Thank you I think I will practice the icord as it is a neat edge thank you for replying much appreciated x
If you find knitting icord fiddly try using wooden dpns
Hi I am just about to work the Icord on the pattern but am confused on how many stitches to use. Do I use them all? PLEASE HELP
Hi Nancy, I’m not sure why I have not seen your question until now. I have never even received a notification from word press, or perhaps I missed it somehow. Sorry!
If you are using smaller size needle then you can use all the stitches but if you are using the same size needle then skip a stitch every two to three stitches. I hope that helps.
Hi I have just finished mmaking the envelope for my daughter who is due to have the baby in September.
Would you please let me know where you got the buttons from as I would like to get some of those as they are gorgeous.
Hi Madhu, I got the buttons from Joann fabric store. They’re from Jesse James baby buttons collection.
Hi,
What age of baby will this sleeping bag fit please?
Many thanks
Hi Pam, the pattern is designed for a newborn to one month old baby, but if you need it to be longer or wider to accommodate older babies please read the section “How to customize size”. Thanks
Thank you for your kind reply. Have started knitting from the pattern. Would you be able to tell me the length and width of the sleeping bag, casting on the original 51 stitches please? Also the comment from Sandy below: does the pattern have the corrected row information now.
Sandy. Just starting the front section of this Fisherman’s Baby Envelope. Love the way it is coming together but am confused on the pattern change for the front vs the back. Each section of the back has 18 rows of the Fisherman’s stitch but as the pattern is written the front has only 10 rows (these counts do not include the garter stitch ridges). In looking at the pictures on the purpleneedle wordpress website, however, the front section shows a row count consistent with the 18 rows of Fisherman’s. Can anyone or the pattern designer help me please?! As written the front is 34 rows less than the back which seems too short to me but what do I know. Thanks all!
Many thanks for your kind help. Regards, Pam ________________________________
Finished Measurements (Unwashed/Unblocked):
Width – 12 ½”
Length (Folded) – 20 ½”
And yes the pattern has the correct row instructions.
Thanks for your question.
Hi… love the pattern, thank you.
The problem I have got is I do not understand clearly where I am applying the icord, have you got a video or can show a diagram of where to do it please?
Hi Heather, thanks for your question. You need to apply the icord to all edges after folding the hood of the envelop and closing its edges using 3 needles bind off method (or any method you like). If you’ve never knitted applied icord before, try it first on a swatch or washcloth. I’ve included in the above comments a link to a video on how to knit applied icord. If that video was not helpful, try typing “knitting applied icord” in youtube search window and see which video explain it best for you. As I said earlier in the pattern, you’ll be applying the icord to all edges. You can start the icord at any point of the blanket edge, but if you want your blanket to look neat and provisional, I suggested, in the pattern, that you start the icord at the fold of the front and back section (where the last row of the back section ends and the first row of the front section starts). I hope that answers your question. Please let me know if you need more explanations.
Heather, I’ve added a photo to the pattern showing where to start the icord. Please check it out and let me know if that’s helpful or not. Thanks
Hi,
I hope you can help me.
I would love to try this pattern (it looks lovely), I’ve done 51 stitches CO but I think it’s too short. It’s only around 5 inches, instead of 12.5 inches. I wonder if I misunderstood the pattern (English isn’t my native language). And there’s no M1 in the pattern. So if I use 4.5mm circular needle, CO 51 stitches it should be 12.5 inches, right?
Or should I add 2 stitches for as many as I want, just like on How to Customize Size section?
Hi RACHF, I’m not sure I understand your question correctly. You mean to say that when you used 4.5mm needle to CO 51 Stitches, the blanket was not wide enough for your baby? I’m not sure how it came to be just 5 inches wide. Perhaps you’ve measured the stitches on the needle?
Try sharing a photo to show what you mean.
The best way to make sure you are knitting the right width blanket, is to make a sample swatch or some knitters call it gauge swatch. As mentioned in pattern, the gauge is 4 stitches per inch. Try knitting 20 stitches sample with 20+ rows and measure how many stitches you get in one inch. If your measurement showed that you have more than 4 stitches per inch or less than 4 stitches per inch, you’ll have to change the needle or the yarn. You can also go on youtube and type “Knitting gauge swatch” and watch how it’s done by different knitters.
If you think that 12.5 inches width is not wide enough for your baby, then add 2 or 4 or 6 or 8 stitches to the CO stitches to make the blanket wider than 12.5 inches. There isn’t M1 in pattern because the increase in stitches is only in the CO not through out the pattern.
I measure the stitches on the needle, I haven’t done anything except CO 51 stitches. It doesn’t look right because the measurement isn’t the same as in the pattern, so something must be wrong.
I think I know now, though. I use different yarn! 😆 it must be because of it, right? And I didn’t make a swatch either.
Thank you very much for the pattern and for answering my question.
I have never incorporated an i-cord with a knitted item before but think I can learn it whilst watching a video. However, I have read your pattern several times and cannot find the number of stitches I need to start the i-cord. Videos I have found say you can use any number of stitches from 3 upwards. How many stitches do I need to cast on to start my i-cord? Thank you.
Hi Suzanne, 3 stitches are the traditional way to start an icord. I’ve seen some use 4 stitches but I think it would be a bit bulky. It’s your choice. If unsure, cast on 3 stitches. I hope that helps.
Thank you